Assembly Process
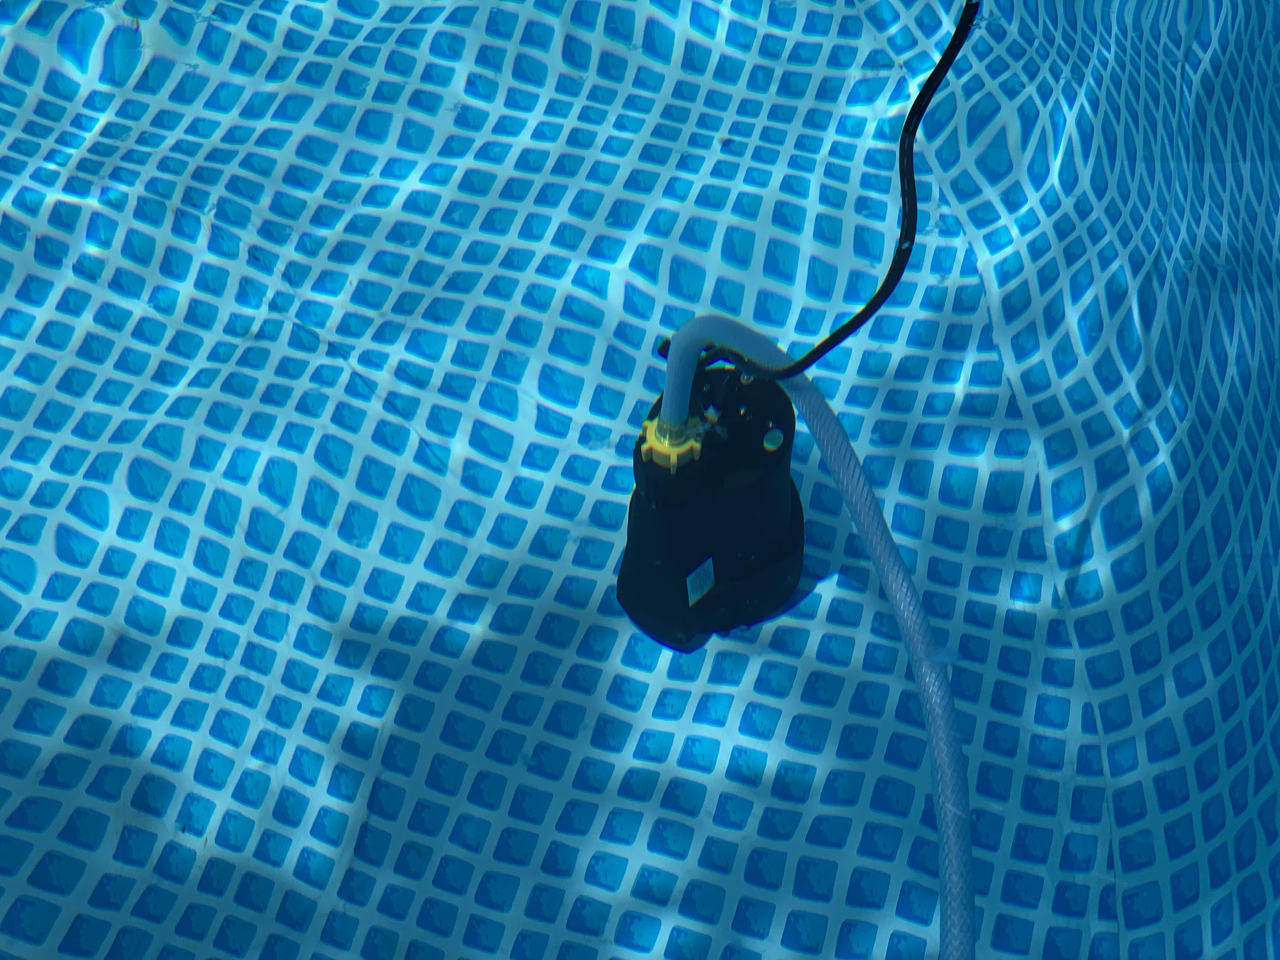
It took a little time to get comfortable placing an electric pump into the water. Be sure to only plug this into a GFCI outlet and test the outlet regularly.
The pump in the parts list included an adapter for garden hoses. Connect one of the drinking water hoses to the pump. Consider zip tying the hose and cord together for easier management.
Step 1: Pump and Filter Setup
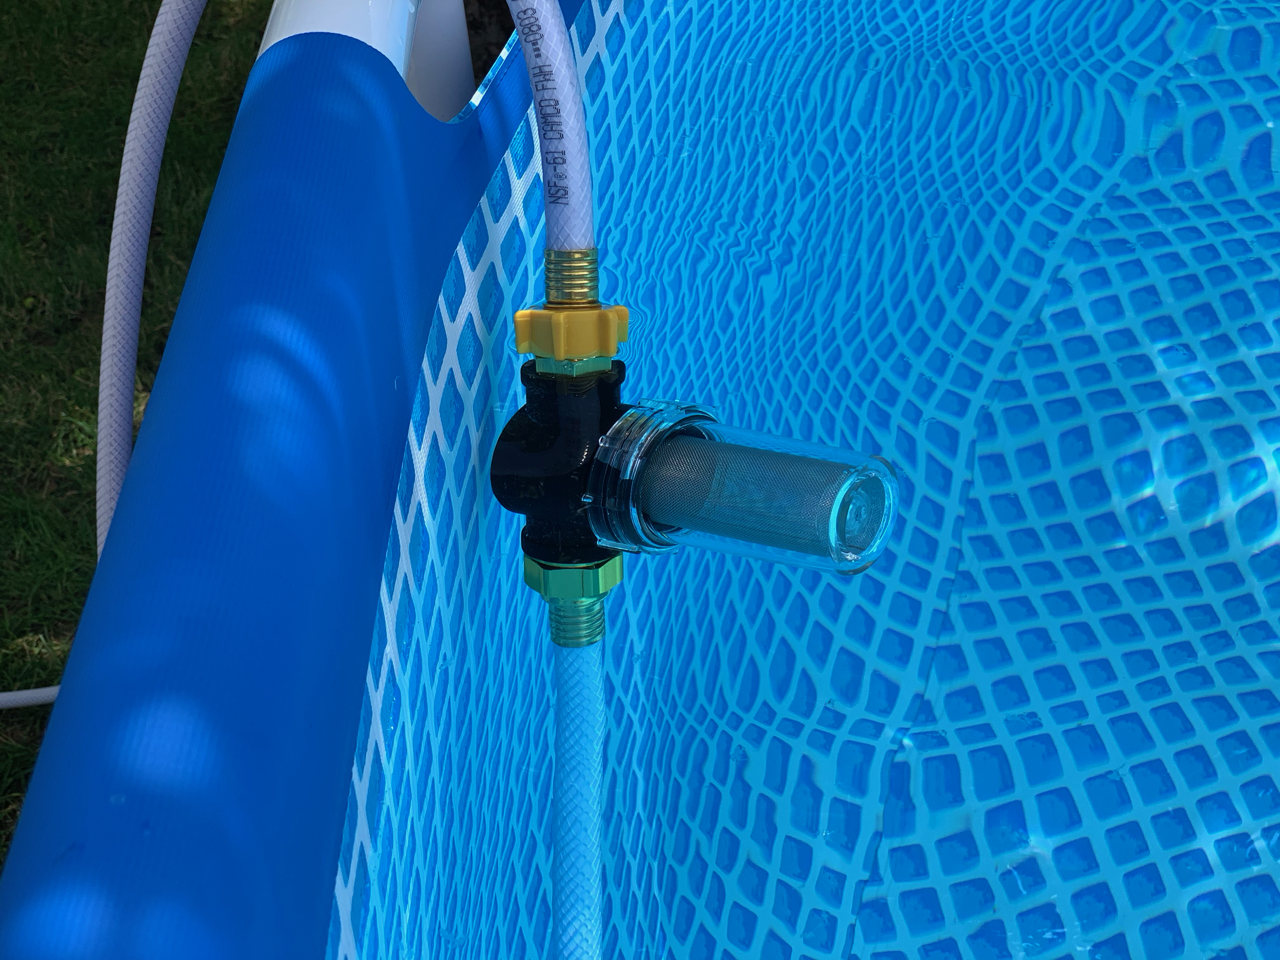
I placed the inlet filter after the first section of hose from the pump, and attached the filter near the top of the pool so we can see when it gets dirty.
Assembly Tips:
- Position the filter where it’s visible for maintenance
- Secure all connections to prevent leaks
- Test filter accessibility before final positioning
Step 2: Heater Connections
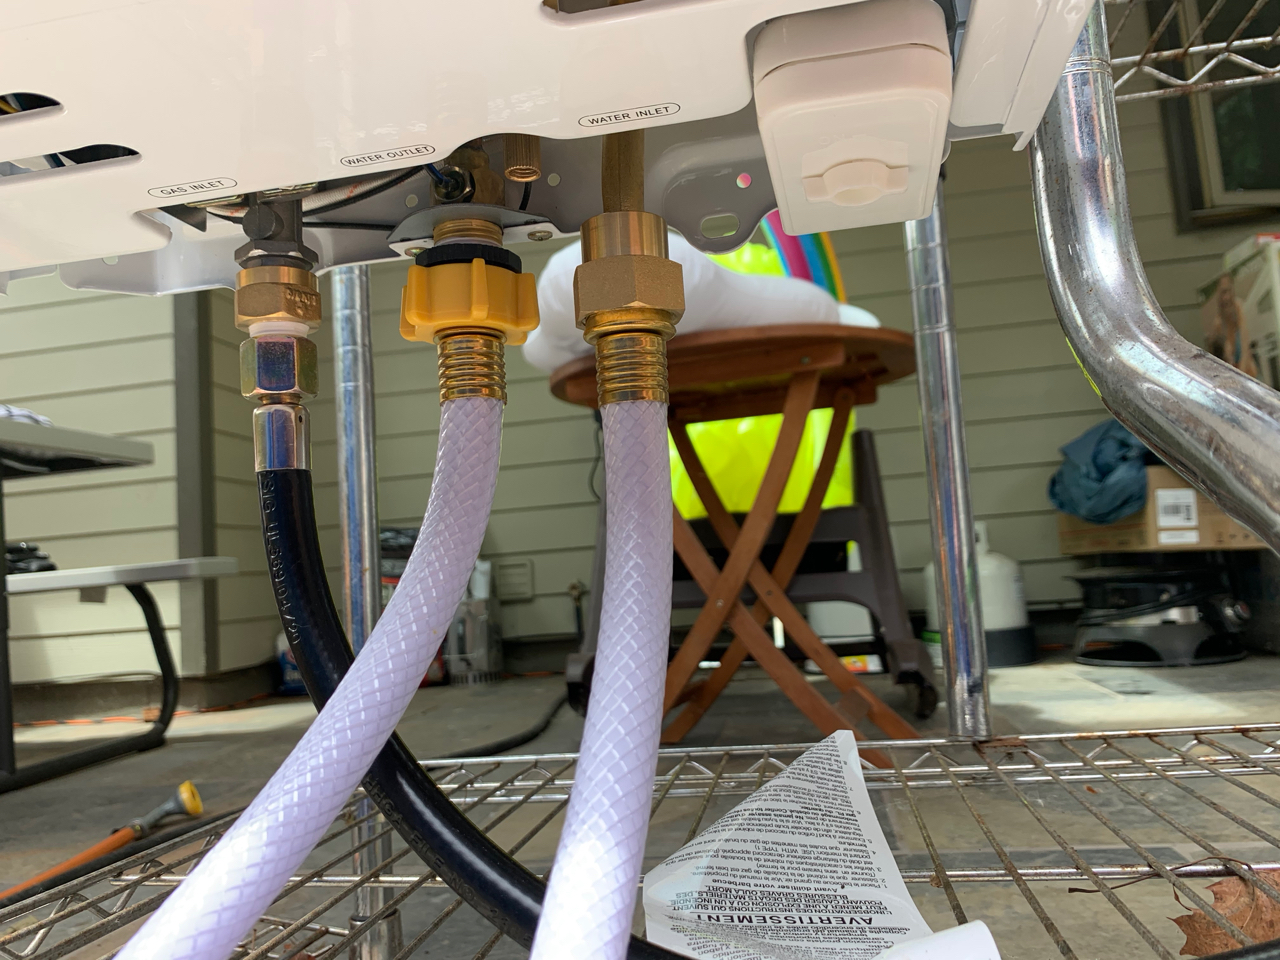
Here are the heater connections coming in from the water pump and inlet filter. There are two drinking water hoses connected in series going back to the pool with heated water. The propane connection is similar to what you would see for a barbecue or firepit.
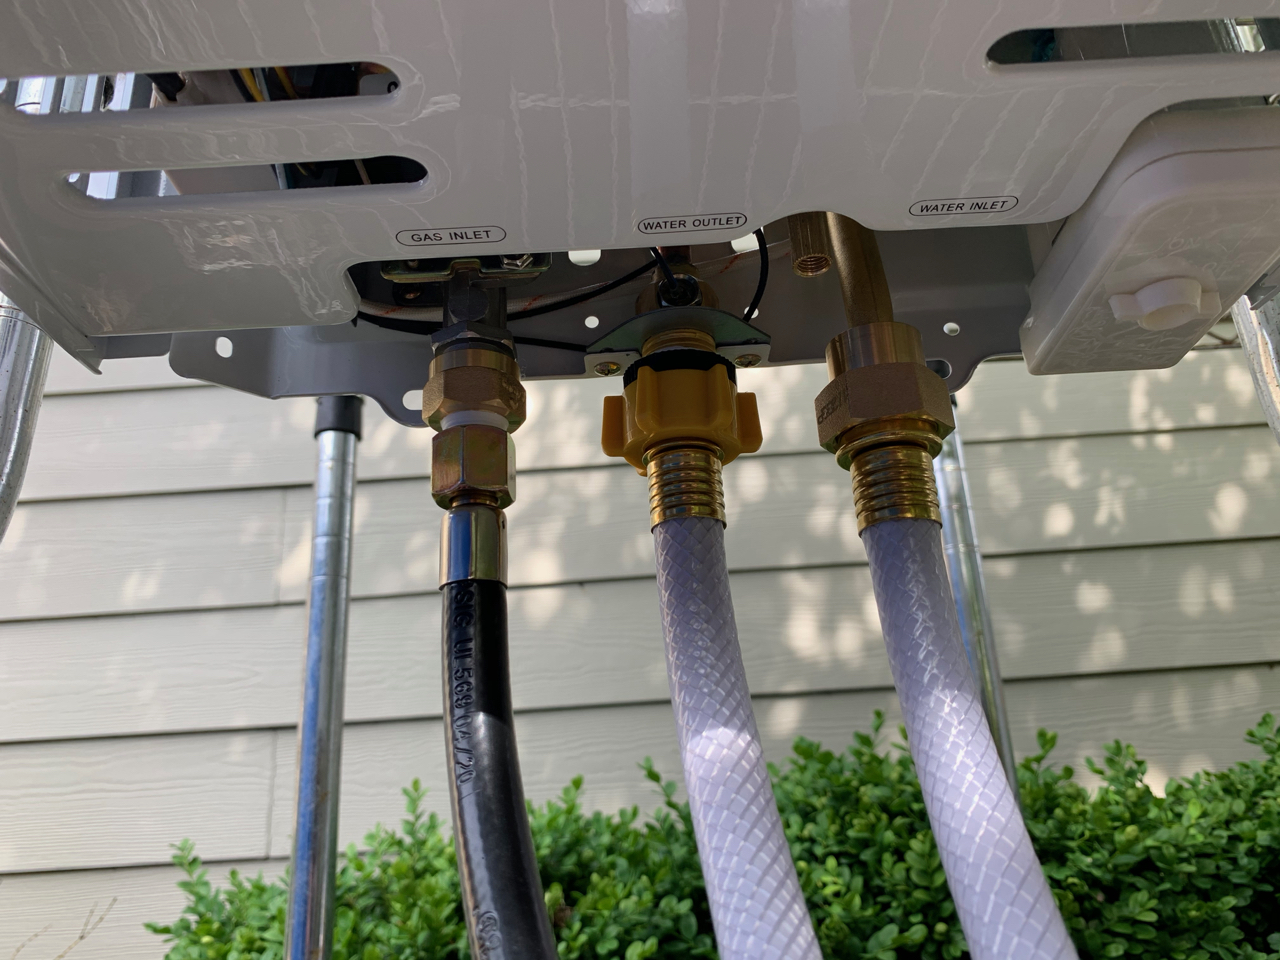
The heater came with various connection adapters for different kinds of hoses including garden hoses. These are the connections we settled on that fit best with the hoses we purchased.
Connection Notes:
- Use the adapters that came with your heater
- Ensure all connections are hand-tight plus 1/4 turn
- Double-check water flow direction
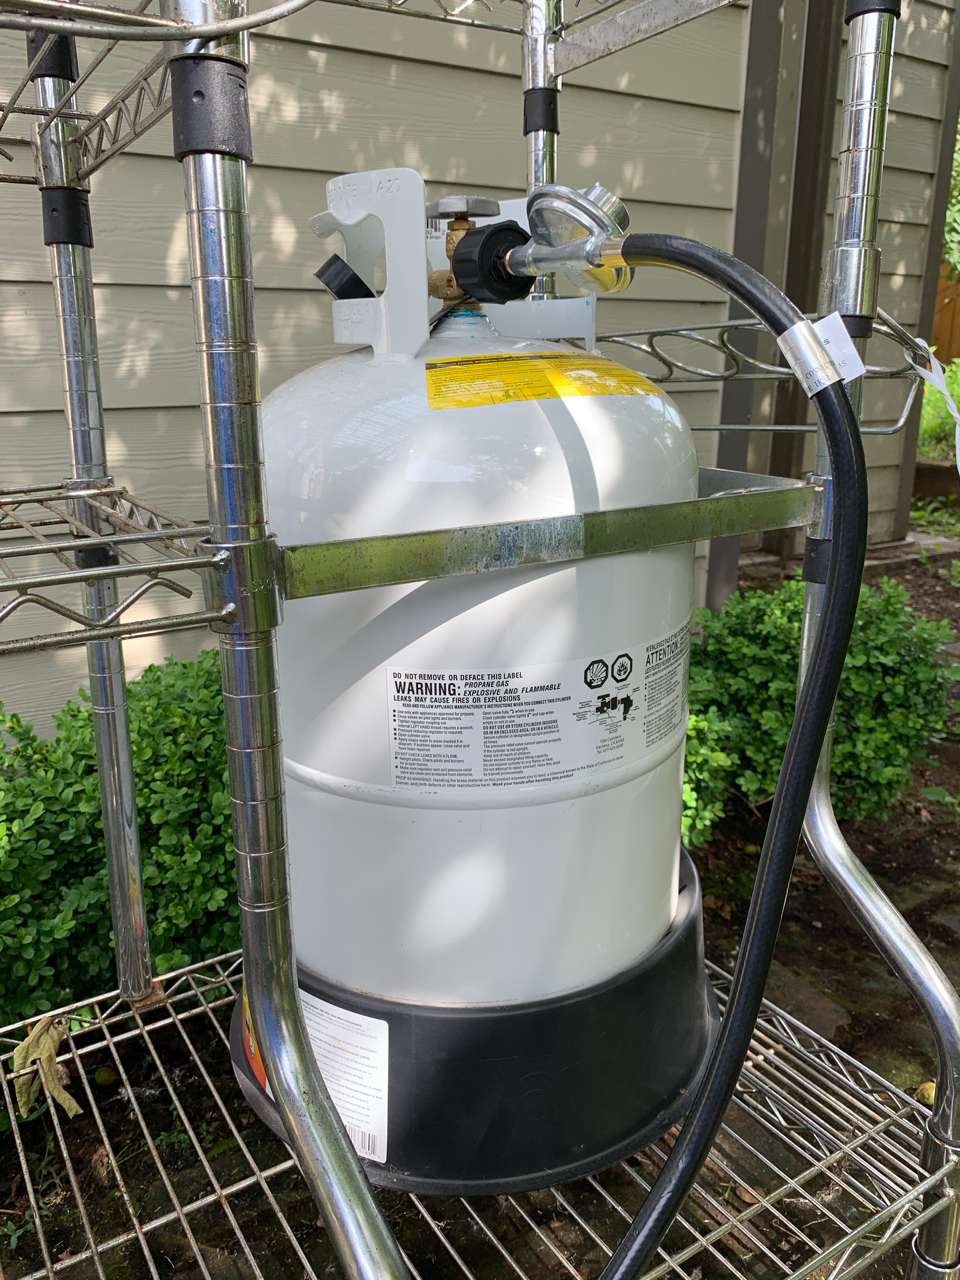
Step 3: Propane Setup
The propane regulator came with the water heater. This is a 30 pound (a little over 7 gallons) cylinder.
Propane Safety Checklist:
- ✅ Check regulator connection for proper threading
- ✅ Use soapy water to test for leaks
- ✅ Ensure cylinder is stable and secure
- ✅ Keep ignition sources away during setup
Testing Procedures
Water System Testing
Follow these steps in order to test the water circulation system:
Initial Flow Test
- Connect one hose to the pump and place the pump in the water
- Power the pump and check the flow with one hose
- Verify pump is working and water is flowing
Filter Integration
- Add the inlet filter and check the flow again
- Note any reduction in flow rate
- Ensure filter is properly secured
Complete Water Circuit
- Add the second hose and connect that to the heater
- Connect the hoses for the outbound hot water and place in the pool
- Connect the propane hose to the heater and tank (leave tank turned off)
- Power the pump again and check for leaks
- You should have water leaving the outbound hose
Heat System Testing
⚠️ Safety First: Only proceed with heat testing after water system is working properly.
Preparation
- Stop the pump
- Check the settings on the heater (start at midway settings)
- Put batteries in the heater
Ignition Sequence
- Turn on the propane
- Start the pump
- Listen for:
- Pump flow sound
- Heater spark igniter clicking
- Sound of successful ignition
Operation Verification
- Check the heater’s display for temperature readings
- Feel the outbound hose for hot water (should be noticeably warmer)
- Let the system run for 10-15 minutes
- Adjust settings as needed
- Check again for any leaks
Troubleshooting Common Issues
No Water Flow
- Check pump power and GFCI outlet
- Verify pump is fully submerged
- Check for kinked or blocked hoses
- Clean pump inlet screen
Heater Won’t Ignite
- Check battery charge in heater
- Verify propane tank is open and has fuel
- Check for proper water flow (many heaters require minimum flow)
- Verify all gas connections are tight
Low Water Temperature
- Adjust heater temperature setting
- Check propane supply level
- Verify adequate water flow rate
- Allow more time for temperature rise
Leaks
- Re-tighten all hose connections
- Check O-rings and seals
- Replace any damaged hoses
- Test propane connections with soapy water
Safety Reminders
- Never leave the system unattended during initial testing
- Always turn off propane first when shutting down
- Test GFCI outlet weekly during pool season
- Keep fire extinguisher nearby during testing
- Check local codes for any permit requirements